Inside the Life of Me.....

Wednesday, August 31, 2011

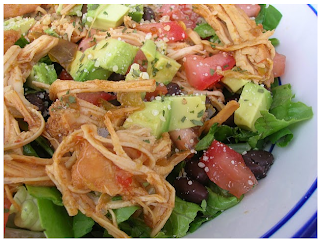
Bajio Crockpot Chicken by Simply Designing

This looks super yummy!!

Crockpot Chicken

4-5 chicken breasts
1/2 c salsa (I used mild but you can spice it up with hotter salsa if you like)
1 T cumin
1/2 c brown sugar (packed)
(1) 4 oz. can diced green chilies
3/4 c Sprite (or similar drink)

  • Place all ingredients in a crock pot
  • Cook on low for most of the day (mine cooked for 6 hours)
  • Remove chicken and shred
  • Mix a couple spoon-fulls of corn starch with water and stir in crock pot to help the mixture thicken.
  • Return shredded chicken to crock pot and mix
  • Cook for approximately 1 more hour
  • Serve with your favorite taco or taco salad fixings

Magnet Board by Martha Stewart

What a creative idea! I love it!


Check out this website for the tutorial!

Saturday, August 27, 2011

Easy Alfredo Sauce

I found this recipe while blog searching today and it looks easy enough!! I love alfredo sauce (actually way better than red sauce), so I will have to try this one soon!

Easy Alfredo Sauce


1 lb Rigatoni Pasta
8 oz Cream Cheese or Neufchatel (room temperature)
1 Stick Butter (room temperature)
8 oz Half & Half
1/4 Cup Grated Parmesan Cheese
1 Tsp Garlic Powder
Black Pepper to Taste

Set the pasta water to boil according to package instructions.  Melt butter in a medium-sized saucepan over medium heat.  Add the cream cheese and half & half.  Keep the mixture moving, breaking the cream cheese into small lumps with a wooden spoon as it softens.  Continue to stir gently.  Once the cream cheese is well on it's way to melting, turn the heat down a bit and add the Parmesan cheese.  Switch to a whisk and stir. Add the pepper and garlic powder.  Continue to whisk for a smooth consistency.  The sauce will thicken as it cooks and you may whisk in some extra milk to  thin it before serving.  Drain the pasta when it's ready.  Serve sauce on pasta or on the side.  This amount of sauce will cover 1lb of pasta nicely.

Courtesy of Dawn @ BeatUntilFluffy.com

What's Cooking White Board (courtesy of Mushki Loves Blog)

I saw this white board and thought it was so cute! What a great idea to lay out your menu for the week (which Ty and I love to do!)


What you need is:
- A 8.5 X 11 frame
- Scrapbook Paper
- Computer/Printer
*OPTIONAL*
-Paint
-Stain

What to do:
1.Paint the outer frame,  and stain it if you chose to (I will probably just spray paint)
2. Find a cute font on your computer that you want to use. If you don't have any that you like, I found this great "How To" at Your Creative Juices here 
they have a list of some great places to get fun fonts and tell you how to download them to your computer.  It was  super easy and you end up with cute fonts that YOU like!

3.Type out the header, here's an example of a few.
Bon Appetit....What's Cooking?...Menu
(Be sure to center it.)

4.Then type out the days of the week.
(Be sure to change the margin back to the right side, unless you want it all centered.)

5. Stick your cute scrapbook paper into your printer and print your menu onto it.

6. Cut your paper down to  the size you need it to fit in your frame.

You will need dry erase markers and possibly an easel (unless the frame has a stand already)... Love it!

Lisa Leonard Designs

Love her!! I just recently got wind of her jewelry and think it is so whimsical and unique... check it out!


Love this bracelet, so simple and classy!


Something fun to wear!


I am hoping to purchase one of her pieces at some point! Until then, I will just look at the pictures and want them!

Glassy Baby-- beautiful blown glass candles

My mother in law gave me a beautiful glassy baby candle for Christmas this past year and ever since then, I have absolutely loved them! They are all hand blown glass and ridiculously gorgeous! I am craving another one, maybe soon?!!


I also love that part of the proceeds are donated to various charities, which they include on the card inside, a great idea for a thoughtful gift!

lovefortitude
Don't you just love the bright colors??
You can visit glassybaby.com to check out all the wonderful choices!

Zucchini Casserole

Here is a good looking zucchini casserole recipe that I found on allrecipes.com

Zucchini Casserole


What you need:
- 2 medium zucchini sliced and unpeeled (1/4 in. slices)
- 1 medium onion (thinly sliced)
- 1 green bell pepper (sliced)
- 1/2 red bell pepper (sliced)
-2 tomatoes (sliced)
- salt and pepper to taste
- garlic powder to taste
- basil and oregano (1/4 tsp. each)
- 6 oz shredded cheddar cheese

What to do:
- Preheat oven to 350 degrees
- butter casserole dish
-arrange zucchini in bottom of casserole dish
- top with onion, green and red pepper and tomato
-sprinkle with herbs
- top with cheese
- bake for 50-60 min

Friday, August 26, 2011

Dessert #8- Peach Cobbler Bars by Sophistimom

These look so delicious! I love peach cobbler!

Peach Cobbler Bars
peach-cobbler-bars-5

1 cup (2 sticks or 224g) unsalted butter at room temperature
2 cups (380g) granulated sugar
1 teaspoon pure vanilla extract
1 teaspoon pure almond extract
4 eggs
3 cups (300g) unbleached all-purpose flour
3/4 teaspoon salt
for the filling:
6-7 peaches, peeled and thinly sliced
1/4 cup brown sugar
1/2 teaspoon cinnamon
for the glaze:
1 cup powdered sugar
2 tablespoons cream
1 teaspoon pure vanilla extract


1. Preheat oven to 350 degrees 180 degrees celsius). Grease a large cookie sheet (half sheet) with butter or nonstick spray. In the bowl of an electric mixer fitted with the paddle attachment, cream together butter and sugar, until smooth and fluffy, about 2-3 minutes. Add in eggs, one at a time, incorporating well after each addition. Add in vanilla and almond extract. Slowly add flour and salt, and mix until just incorporated.
2. Spread three-fourths of the mixture into the prepared pan. Mix the peaches, brown sugar, and cinnamon in a medium sized bowl, and distribute evenly over the batter. Drop the rest of the batter by tablespoonfuls over the peaches, and bake for 25-30 minutes, or until the edges start to turn golden brown.

3. Whisk together the powdered sugar, and cream and drizzle half of the mixture over the warm bars. Allow to cool, cut into 3 inch squares, and drizzle over the remainder of the glaze. 

Dessert #7- Chocolate Chip Cookie Dough Brownies by Recipe Girl

Tyler and I have made these from a box before, but never from scratch, I bet they will be much better!

Chocolate Chip Cookie Dough Brownies


Ingredients:


BROWNIE:

4 ounces unsweetened chocolate, finely chopped

1 cup butter, at room temperature
2 cups light brown sugar, packed
4 large eggs
2 teaspoons vanilla extract
1 cup all-purpose flour

COOKIE DOUGH (EGG FREE!):

3/4 cup butter

3/4 cup light brown sugar, packed
3/4 cup granulated white sugar
3 Tablespoons milk
1 1/2 teaspoons vanilla extract
1 1/2 cups all-purpose flour
1 1/2 cups mini chocolate chips

1/2 cup semisweet chips + 1 teaspoon shortening for drizzle, optional

Directions:

1. Prepare the brownies: Preheat oven to 325 degrees F. Spray a 9x13-inch pan with nonstick spray. In a medium glass bowl, melt chocolate in the microwave in short bursts of 30 seconds; stir after each burst and remove from microwave when melted and smooth. Set aside to cool slightly. In a large mixing bowl, mix butter and brown sugar with an electric mixer. Beat in eggs and vanilla extract. Mix in melted chocolate. Blend in flour and mix just until combined (don't over-mix). Spread batter into prepared pan. Bake 25 to 35 minutes. Watch closely and remove from oven when toothpick inserted into the center comes out clean. Let cool completely.
2. Prepare the cookie dough: In a medium bowl, use an electric mixer to combine butter, brown sugar and white sugar. Mix in milk and vanilla. Mix in flour just until combined. Stir in chocolate chips.
3. Spread cookie dough over the cooled brownies. Refrigerate until the dough is quite firm. It's okay to speed up the process and place it in the freezer too. The firmer the dough, the easier it will be to cut into neat squares. Use a sharp knife to cut the brownies. You may need to wipe the knife off with a paper towel in between cuts since the fudgy brownies and cookie dough will tend to stick to the knife a bit. These brownies are best to serve placed inside cupcake papers and served with a fork.
4. If you'd like to add chocolate drizzle on top, melt 1/2 cup chocolate chips with 1 teaspoon of shortening in the microwave; stir until smooth. Scoop the melted chocolate into a zip baggie and snip off the corner. Squeeze the bag to drizzle the chocolate on top of each brownie. Sprinkle additional chocolate chips on top, if desired.

Dessert #6- Chocolate Peanut Butter Pretzel Balls by Make Happy

Can't wait to try these!


Chocolate Peanut Butter Pretzel Balls

1 1/2 C pretzels
1/2 C creamy peanut butter
1 Tbsp butter, softened
2 Tbsp brown sugar
1/8 tsp salt
3 Tbsp powdered sugar
1 C semi-sweet chocolate chips
  • Crush pretzels into small bits. (I tried this first by bashing the pretzels in a baggie. Then I tried chopping them in a food processor. The results were mostly the same, though I felt I had more control with the baggie method.)
  • In a small bowl, combine peanut butter, butter, brown sugar and salt. Stir until all ingredients are completely blended and smooth.
  • Add pretzel bits to peanut butter mixture and mix thoroughly.
  • Add powdered sugar and, again, mix thoroughly. It should look like this:
  • Prepare a chilling tray--a dinner plate covered with waxed paper works well.
  • Take about a teaspoon of the peanut butter pretzel mixture into your fingers and gently pat it into a ball with your fingertips. (The powdered sugar will make the peanut butter less sticky, but it's still too sticky to roll well, hence the patting.)
  • If the peanut butter starts sticking to your fingers, your fingers are too warm. Run your fingers under cold water for a minute to chill them, and begin rolling again.
  • Place the peanut butter balls onto the plate. When you have rolled all the balls, place the entire plate into the refrigerator to chill for at least 30 minutes.
  • After the peanut butter balls have chilled, prepare your chocolate. Pour the chocolate chips into a small microwaveable bowl. Microwave for 30 seconds and stir. If needed, microwave for another 10 seconds and stir again. Continue until the chips are completely melted, which means they stir easily into smooth, fluid chocolate with no lumps.
  • Place one peanut butter ball into the melted chocolate and gently roll it around with a fork until completely coated. Remove from the bowl with the fork and place back on the waxed paper plate. Repeat for all other balls.
  • Once all the peanut butter balls are coated in chocolate, return the plate to the refrigerator and chill another 30 minutes.
When they're done, they should look like this:
This recipe makes approximately 22 balls. It is very easy to double, triple, quadruple this recipe. But unless I can count on sharing these with several people, I stick to small batches. :)

Store in the refrigerator until ready to eat.

Dessert #5- Cookie Dough Cheesecake Bars by My Baking Addiction

Another yummy one!

Cookie Dough Cheesecake Bars


For the Crust:
1 1/2 cups graham cracker crumbs
5 tablespoons unsalted butter, melted

Chocolate Chip Cookie Dough:
5 tablespoons unsalted butter, room temperature
1/3 cup packed light brown sugar
3 tablespoons granulated sugar
1/4 teaspoon salt
1 teaspoon pure vanilla extract
3/4 cup flour
1 cup chocolate chips

For the Cheesecake Filling:
10 oz cream cheese, room temperature
1/4 cup sugar
1 large egg, room temperature
1 teaspoon pure vanilla extract

PREPARATION:

1. Preheat the oven to 325 F. Line an 8 inch square baking pan with parchment paper or foil allowing a little overhang and spray with nonstick cooking spray. Set aside.
2. Mix the melted butter and graham cracker crumbs until thoroughly combined. Press the mixture into the bottom of the prepared pan. Bake in preheated oven for 6 minutes. Remove pan to a cooling rack. Do not turn your oven off.
3. While the crust is cooling, prepare the chocolate chip cookie dough. In the bowl of a stand mixer fitted with the paddle attachment or in a large bowl with an electric mixer, beat butter, brown sugar, granulated sugar, salt and vanilla until smooth and thoroughly combined, about 1 minute. Mix in the flour on low speed, and mix until just incorporated. Mix in the chocolate chips. Set aside.
4. In the bowl of a stand mixer fitted with the paddle attachment or in a large bowl with an electric mixer cream together the cream cheese and sugar until smooth. Mix in the egg and vanilla on low speed just until incorporated. Pour the cheesecake batter into the prepared crust. Using your hand to form clumps, distribute the cookie dough onto the top of the cheesecake batter in teaspoon-sized clumps. Be sure to use all of the dough. You will cover most of the cheesecake batter.
5. Bake for about 30 minutes, until the top feels dry and firm (the cookie dough) and the entire pan looks set if given a gentle shake. Move bars to a cooling rack and allow to cool completely.
6. Lift the bars out by the overhang; slice into desired size and store in the refrigerator. Serve cold or at room temperature

Dessert #4- Chocolate Peanut Butter Cheesecake by Erin's Food Files

Tyler and I love peanut butter, so this recipe is perfect!

 Chocolate Peanut Butter Cheesecake

CHEESECAKE:
1 1/4 pounds bar cream cheese (20 oz), room temperature
3/4 cups sugar
1/2 tablespoon vanilla extract
1/4 teaspoon coarse salt
2 large eggs
1/2 cup sour cream
CAKE:
Butter, for greasing the pans
1 3/4 cups all-purpose flour, plus more for pans
2 cups sugar
3/4 cups good cocoa powder
2 teaspoons baking soda
1 teaspoon baking powder
1 teaspoon kosher salt
1 cup buttermilk, shaken
1/2 cup vegetable oil
2 extra-large or large eggs, at room temperature
1 teaspoon pure vanilla extract
1 cup freshly brewed hot coffee
FROSTING:
8 ounces cream cheese
3 cups confectioners' sugar (more or less, depending on consistency, your preference)
3/4 teaspoon salt
1 1/2 cups creamy peanut butter (not natural)
1 teaspoon pure vanilla extract
3/4 cup heavy cream (more or less, depending on consistency, your preference)

Directions:

CHEESECAKE:
Preheat oven to 325 degrees. Set a kettle of water to boil. Using an electric mixer, beat cream cheese on medium until fluffy, scraping down side of bowl. Gradually add sugar, beating until fluffy. Beat in vanilla extract and salt. Beat in eggs, one at a time, scraping down side of bowl after each addition. Beat in sour cream.
Cut parchment paper in a circle and line the bottom of the cheesecake pan. Wrap bottom half of pan in foil. Pour in filling; place in a roasting pan. Pour in boiling water to come halfway up side of springform. Bake until just set in center, about 45 minutes. Remove pan from water; let cool 20 minutes. Run a paring knife around edge; let cool completely. Cover; chill overnight, then wrap in plastic wrap and freeze.
CAKE:
Preheat the oven to 350 degrees F. Butter 2 (9-inch) round cake pans. Line with parchment paper, then butter and flour the pans.
Sift the flour, sugar, cocoa, baking soda, baking powder, and salt into the bowl of an electric mixer fitted with a paddle attachment and mix on low speed until combined. In another bowl, combine the buttermilk, oil, eggs, and vanilla. With the mixer on low speed, slowly add the wet ingredients to the dry. With mixer still on low, add the coffee and stir just to combine, scraping the bottom of the bowl with a rubber spatula. Pour the batter into the prepared pans and bake for 35 to 40 minutes, until a cake tester comes out clean. Cool in the pans for 30 minutes, then turn them out onto a cooling rack and cool completely.
FROSTING:
Beat cream cheese and peanut butter with a mixer on medium speed. Add salt, then vanilla. Alternating, add confectioners' sugar and heavy cream until desired consistency is reached.
Use immediately, or cover and refrigerate until needed.
ASSEMBLY:
Place one layer of cake on cake stand. If desired, frost top with peanut butter frosting. Remove cheesecake from freezer, unwrap, and remove from metal bottom of the pan, then peel off parchment paper. Place cheesecake layer on top of the cake. If the cheesecake is wider than the cake, and it is necessary to to trim it, wait approximately 10 minutes for the cheesecake to soften, then trim it with a knife. Place top layer of cake on top of the cheesecake, and coat with a layer of the peanut butter frosting to act as the crumb coat. Be careful not to get any crumbs in the bowl of frosting! Refrigerate approximately 30 minutes, then frost with as much of the remaining frosting as necessary. Top with shaved chocolate, chocolate chips, or decoration of your choosing. Refrigerate until ready to serve.
Dessert #3- Cookies and Cream Cheesecake Bars by Six Sister's Stuff

Love cookies and cream, these look amazing!

Cookies and Cream Cheesecake Bars

CRUST:
1 (1 pound) package Oreo cookies 
4 Tablespoons unsalted butter, melted 

FILLING:
3 (8 ounce) packages cream cheese, at room temperature  (I used low fat!)
3/4 cup granulated white sugar 
3/4 cup sour cream, at room temperature 
1 teaspoon vanilla extract 
1/2 teaspoon salt 
3 large eggs, at room temperature

Directions:

1. Preheat oven to 325°F. Line a 9 x 13-inch pan with foil, leaving a 2-inch overhang on two sides (I spray mine with cooking spray).

2. Make the crust: Place 28 Oreos in a food processor and process until finely ground. Pour into a large bowl, add the melted butter, and stir with a flexible spatula until all crumbs are moistened. Place the cookie-crumb mixture in the lined pan and, using your fingers, press the mixture firmly and evenly into the bottom. Bake 10 minutes, then remove to a wire cooling rack (leave the oven on) while you make the filling. Snap the remaining Oreos in half, put them in the food processor, and turn on and off quickly a few times, just until the cookies are roughly chopped.

3. Make the filling: In a large bowl, using an electric mixer on medium speed, beat the cream cheese and sugar until well blended, about 2 minutes. Scrape down the sides and bottom of the bowl with a flexible spatula and beat again until uniform. Beat in sour cream, vanilla and salt. Scrape down the bowl and mix again. Add the eggs, one at a time, beating well after each. After beating in the last egg, scrape down the sides and bottom of the bowl and beat one more time, to make sure the mixture is fully combined. Stir in chopped Oreos with the same spatula.

4. Pour the cream cheese mixture over the baked cookie crust, smooth the top with the spatula, and bake for 40 minutes, until the filling is set around the edges but still slightly wobbly in the center when you gently shake the pan. Remove the pan to a wire rack to cool to room temperature, about 1 hour. When cool, cover it with foil and refrigerate until well chilled, at least 3 hours. (I chill mine overnight)

5. To cut, use the foil overhang to lift the cheesecake out of the pan and place on a large cutting board. Use a sharp chef's knife to cut the cheesecake into bars, rinsing off the knife with hot water and wiping it dry between each cut. Keep refrigerated until ready to serve.

Dessert #2- Brownie Bottom Raspberry Swirl Cheesecake by A Crafty Cook

Amazing...

Brownie Bottom Raspberry Swirl Cheesecake

What you need:
Brownie mix for an 8x8 pan
6oz raspberries
2 tablespoons sugar

What to do:
Prepare brownies according to package instructions. Pour brownie batter in bottom of greased 9 inch spring form pan. Bake brownie at 350F for 10 minutes. Brownie should be under cooked. (I cooked it for 15 minutes and that was too long.  The brownie was just a little too overdone after baking with the cheesecake) 
While brownie is cooling prepare cheesecake filling.  Poor filling over brownies. Take raspberries and puree them in a blender then run through a sieve to remove seeds. Add 2 tablespoons sugar to the raspberry puree.  Drop dots of raspberry puree over the top of the cheesecake filling. We are looking for a nice polka dotted top. You probably won't need all of the raspberry puree I only used about half.  Then run a toothpick along the top, through the dots of raspberry puree leaving a swirled pattern. 
Bake and cool cheesecake according to cheesecake filling recipe instructions. I baked mine at 375F for about 35 minutes, because that's what the cheesecake supreme recipe called for.


Get Ready for some desserts! #1- Red Velvet Cream Cheese Swirl Brownies by Baked Perfection

RI have been REALLY into desserts lately, not that I make them regularly, or eat then regularly, but my sweet tooth has taken over and I would LOVE to try some of these desserts you are about to see in a row on my blog.. so without further ado, here we go!

Red Velvet Cream Cheese Swirl Brownies

Red Velvet Layer:1 stick unsalted butter, melted
1 cup sugar
1 teaspoon vanilla extract
1/4 cup cocoa powder
Pinch salt
1 tablespoon red food coloring
1 teaspoon apple cider vinegar
2 eggs
3/4 cup all-purpose flour

Cream Cheese Layer:
8 ounces cream cheese, softened
1/4 cup sugar
1 egg
1/2 teaspoon vanilla extract

Preheat oven to 350 degrees F. Butter an 8 by 8-inch baking pan, and set aside.

Brownie layer: Add melted butter to a large bowl and add the sugar, vanilla, cocoa powder, salt, food coloring, and vinegar, in that order, mixing between additions. Whisk the eggs in a small bowl and stir it into the cocoa mix. Fold in the flour until lightly combined. Pour the batter into the prepared baking pan, saving 1/4 cup of the batter for the top.

Cream cheese layer: Blend together the cream cheese, sugar, egg, and vanilla in a medium bowl. Gently spread the cream cheese layer on top of the brownie batter in the pan. Dollop the remaining brownie batter over the cream cheese layer. Using a skewer or the tip of a knife, drag the tip through the cream cheese mixture to create a swirl pattern. Bake the brownies for 30 minutes. Remove to a cooling rack and allow them to cool completely before cutting.

Thursday, August 25, 2011

Fresh Tomato Salsa by Martha Stewart

This would be a great football snack!

Fresh Tomato Salsa

Ingredients

  • 1 1/2 pounds plum tomatoes (6 to 8), cored, halved, and seeded
  • 1/2 medium red onion, minced (1/2 cup)
  • 1 jalapeno or serrano chile (ribs and seeds removed for less heat, if desired), minced
  • 1 small garlic clove, minced
  • 1/2 cup chopped fresh cilantro
  • 2 tablespoons freshly squeezed lime juice
  • Coarse salt
  • Tortilla chips, for serving (optional)

Directions

  1. Chop tomatoes into 1/4-inch pieces; transfer to a medium bowl. Add onion, chile, garlic, cilantro, and lime juice; season generously with salt. Mix to combine. Let stand 15 minutes to develop flavor. Salsa can be kept at room temperature up to 2 hours. Serve with tortilla chips, if desired.

Tomato and Basil Pasta by Martha Stewart

Another favorite of ours!

Tomato and Basil Pasta

Ingredients

  • 1/4 cup extra-virgin olive oil
  • 3 thinly sliced garlic cloves
  • 1/2 teaspoon coarse salt
  • 1/2 teaspoon freshly ground pepper, plus more for sprinkling
  • 1 pound cooked and drained short pasta (such as campanelle)
  • 4 medium tomatoes
  • 1 pound burrata (igourmet.com) or mozzarella cheese
  • Small basil leaves

Directions

  1. Combine olive oil, garlic, salt, and pepper in a large bowl. Toss in cooked and drained pasta. Tear tomatoes and cheese; scatter over pasta. Garnish with basil leaves, and sprinkle with pepper.

Tomato and Goat Cheese Tart by Martha Stewart

Tyler and I love goat cheese, gotta try this one!

Tomato and Goat Cheese Tart

Ingredients

  • All-purpose flour, for rolling
  • 1 sheet frozen puff pastry, thawed
  • 1 tablespoon sour cream
  • 1 teaspoon grainy mustard
  • Coarse salt and ground pepper
  • 2 large leeks, white and light-green parts only
  • 1 tablespoon unsalted butter
  • 3/4 pound grape or cherry tomatoes, halved if large, or plum or beefsteak tomatoes, sliced 1/4 inch thick, or a combination
  • 2 ounces fresh goat cheese, crumbled
  • 2 teaspoons fresh thyme or basil leaves

Directions

  1. Preheat oven to 400 degrees. On a lightly floured work surface, roll out puff pastry to a 12-inch square; transfer to a parchment-lined baking sheet. In a small bowl, stir together sour cream and mustard and season with salt and pepper. Spread sour cream mixture evenly over pastry. Fold over 1/2-inch border on all sides and press edges to seal. Refrigerate 10 minutes.
  2. Meanwhile, halve leeks lengthwise; rinse thoroughly, pat dry, and slice 1/4-inch thick. In a large skillet, melt butter over medium-high. Add leeks, season with salt and pepper, and cook, stirring frequently, until soft, 3 minutes. Reduce heat to medium and cook, stirring frequently, until leeks are very soft, 5 minutes. Arrange leeks evenly over sour cream mixture on pastry. Top with tomatoes and season with salt and pepper. Bake until pastry is golden brown and crisp, 25 minutes. Let cool slightly. Top with goat cheese and herbs before cutting into squares. Serve warm or at room temperature.


Zucchini Lasagna by Martha Stewart

Notice a trend here?? :) Love my zucchini!

Zucchini Lasagna

Ingredients

  • Olive oil, for baking dish
  • 8 ounces reduced-fat cream cheese, room temperature
  • 1 container (15 ounces) part-skim ricotta cheese
  • Coarse salt and ground pepper
  • 2 medium zucchini (8 ounces each), halved lengthwise, then sliced thinly crosswise
  • 1 garlic clove, minced
  • 2 teaspoons dried oregano
  • 6 no-boil lasagna noodles
  • 2 ounces shredded (1/2 cup) part-skim mozzarella cheese

Directions

  1. Preheat oven to 425 degrees. Lightly oil an 8-inch square baking dish; set aside.
  2. In a medium bowl, stir together cream cheese and ricotta; season with salt and pepper. In another medium bowl, combine zucchini, garlic, and oregano; season with salt and pepper, and toss to combine.
  3. Spread 1/3 zucchini mixture in prepared baking dish; top with two lasagna noodles, then 1/3 ricotta mixture. Repeat twice with remaining zucchini mixture, noodles, and ricotta mixture, finishing with the ricotta mixture. Sprinkle with mozzarella.
  4. Cover baking dish with aluminum foil; bake until bubbly and noodles are tender, 30 to 35 minutes. Remove foil; bake until golden brown, 15 to 20 minutes more. Let stand 10 minutes before serving.